


Original Sketches
I decided to go with my first sketch:

First I cut copper into strips and hammered different textures on each strip
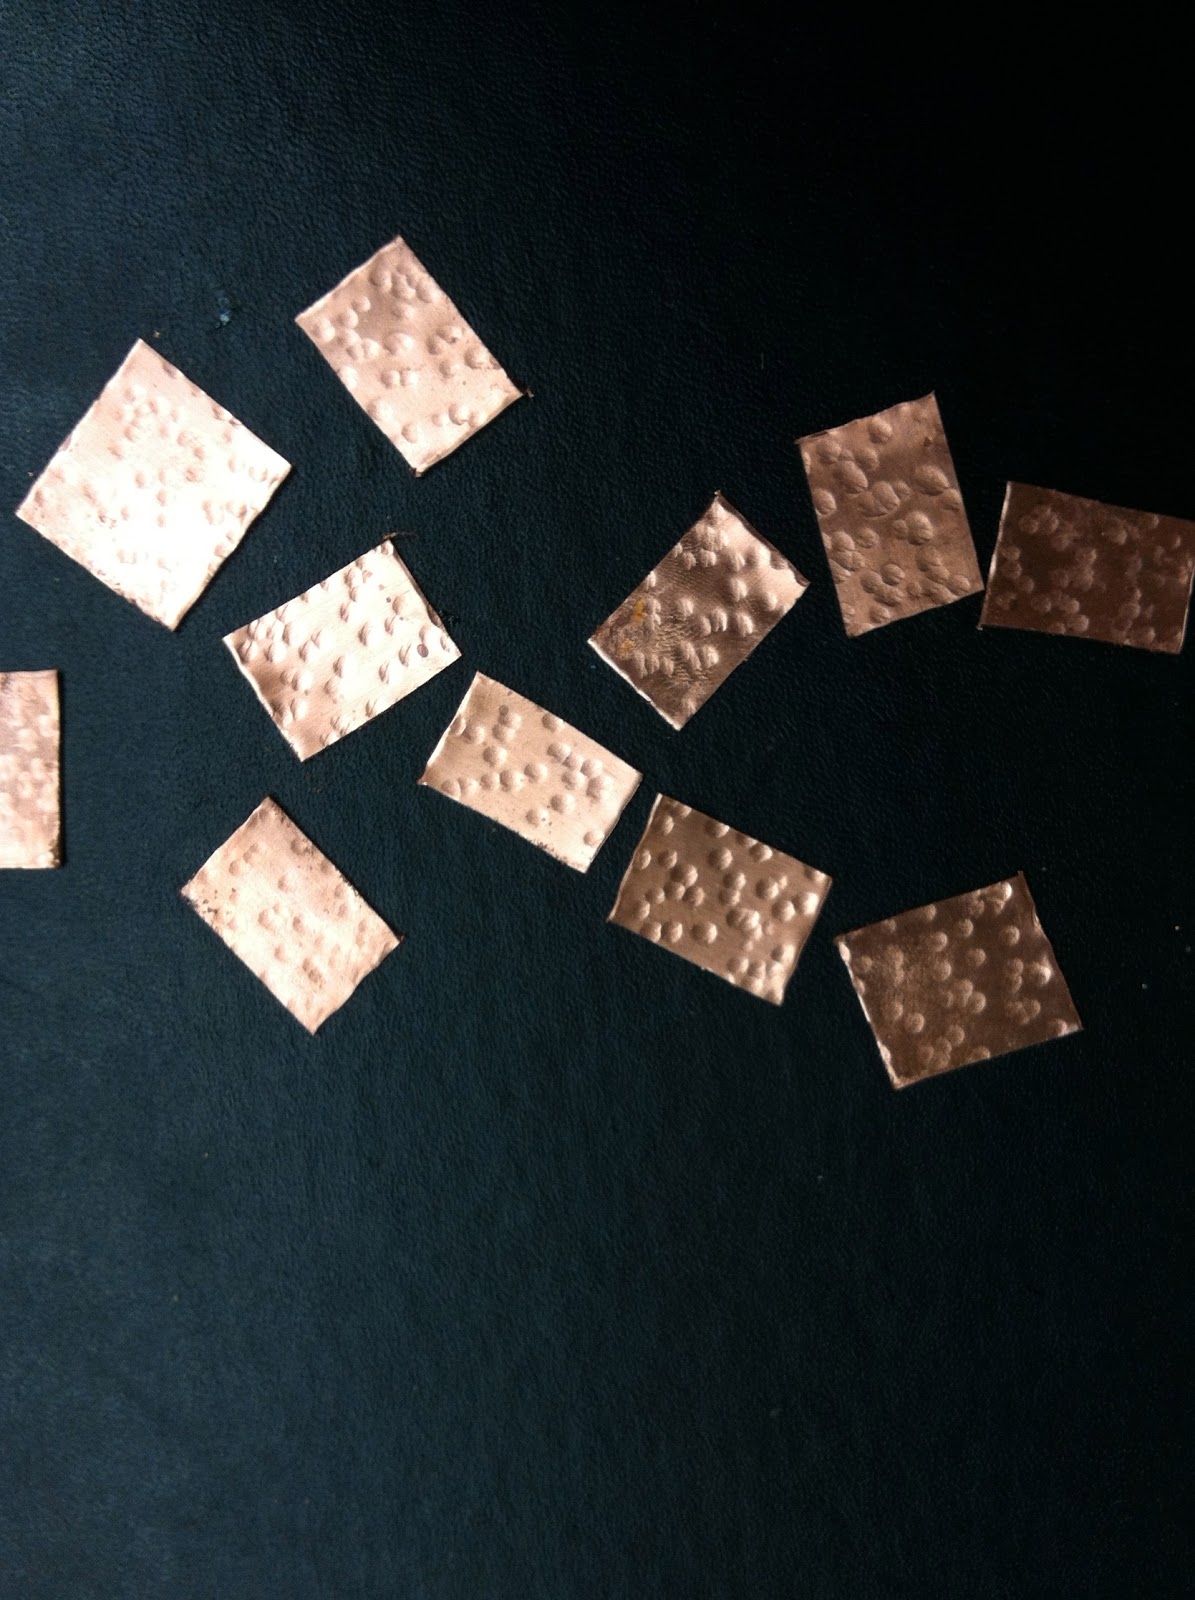
I then cut the strips into small rectangles

I hammered the edges of the rectangles and then filed the corners and edges to create a non-uniform edge
I wanted it to appear as though the pieces were naturally found this way

Continuing to create multiple rectangles
I don't want any two pieces to look the same

I continued to make rectangles at home

I started to make jump rings. These were the most frustrating to make! I could not figure out how to hold the coils and saw them at the same time. I did a lot of research and found a pair of pliers from Eurotool that held the coils while you cut. But of course, they did not carry those at Terra Firma. Maybe one day I will invest in these: Coil Cutting and Holding Pliers (click on the link to check them out!)

Several band-aids later I finally had enough jump rings and the smarts to put a glove on my left hand.

I then drilled 4 holes in my hammered rectangles

Only to realize that when I did this, I could not form the piece into a shape that would hang around the neck. To fix this problem, I tried putting jump rings in the top holes only, but I still couldn't form it into a necklace shape, the jump rings were too small. After struggling so much with the jump rings, I didn't want to have to re-make them larger. I could use these pieces in the future to make a matching bracelet but these pieces were now ruined because there were four holes in them, two of which were non-functioning. Not to mention I didn't consider the fact that once there were jump rings in the bottom holes, I couldn't attach another rectangle underneath like I had wanted in my original design

So my design changed again, and with the leftover rectangles that I had not drilled holes into (luckily I did not drill holes into all of the pieces at one time), I punched two holes in the top of the rectangles only. And instead of one jump ring in-between each piece, I used 3.

I created a toggle clasp that I felt went with my design

Since it is difficult for me to make it to campus to work in the studio, I bought a mini butane torch for soldering my jump rings

Soldering my jump rings
Then the next problem arose. Since I was working from home, I did not have a pickle pot to clean my chain. I found that the small torch was beneficial due to the close proximity of the jump rings, but every few jump rings, the solder would flow, but not where it was supposed to. This is a problem because in order for the solder to flow where I wanted it to, the area had to be clean (which was now oxidized due to the unsuccessful prior attempt. I considered buying a small crock pot and creating my own pickle, but I didn't want to spend any more money

So I did a little more research, and looked for a way to remove oxidization without a pickle. And came upon a recipe calling for 1/2 cup vinegar, 1/2 cup of salt, and 1/2 cup of flour. I thought I'd give this a try because vinegar is acidic and a pickle pot contains acid. This created a foul smelling paste that I then painted onto my chain
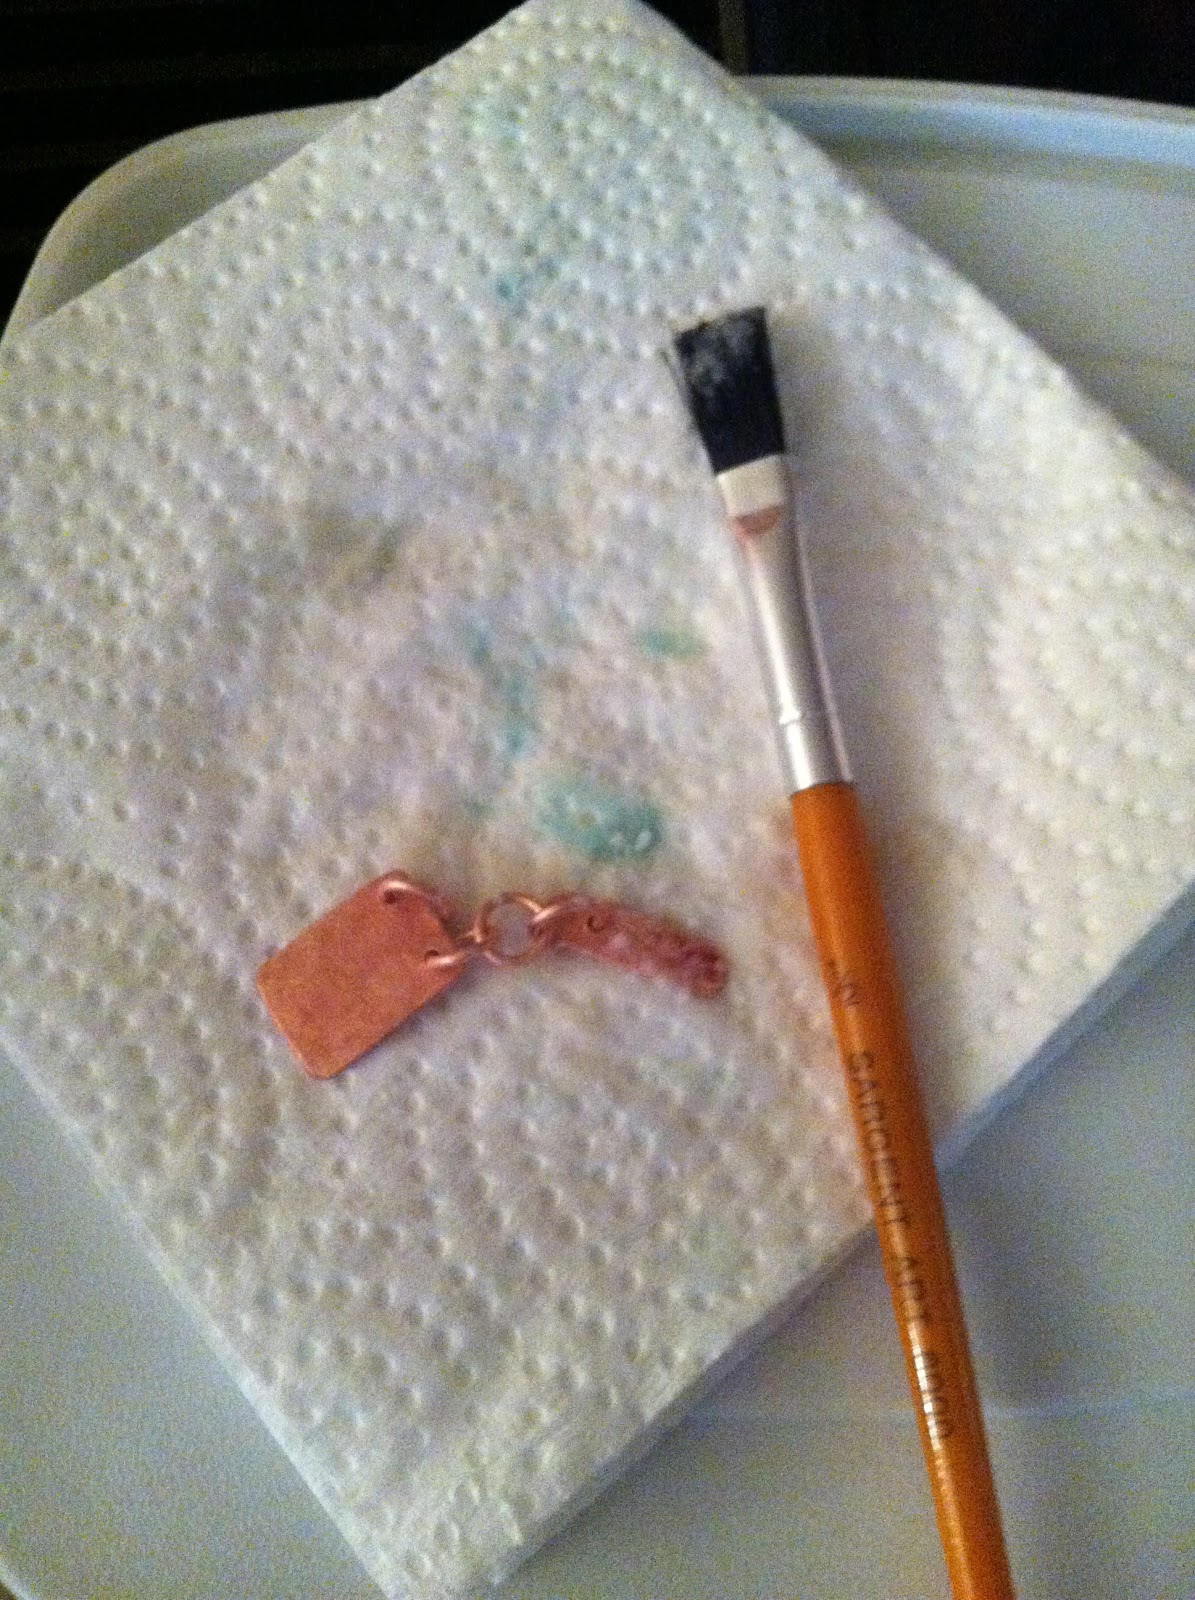
Surprisingly, it worked! The downside to this process is that you had to let the paste sit on the metal for 15-20 minutes, and then using a toothbrush brush it off under warm water. Not only did I have to do this process once, I had to do it several times to remove the oxidization. I probably had to do this at least 15 times due to the jump rings not soldering properly as well as having to repeat the process.

After filing the jump rings, I decided to add another row of rectangles because I wasn't satisfied with it at this point

Beginning to add another row of rectangles

Finished the second row, about to start soldering the jump rings

Final piece, after adding a patina with my torch


A lot of blood, sweat, and tears went into this necklace, and after all is said and done, I am very, very pleased with the final piece.
Update: I put my chain into the tumbler for about 45 minutes. I chose this amount of time because I didn't want the patina to be ruined. However, that is exactly what happened. The patina was completely removed. I re-patina my chain and could not achieve the same results as before. I am pleased with how some of the rectangles came out, but most of them I find to be ugly. Oh well, I guess I'll try again soon.


